Friday, June 18, 2010

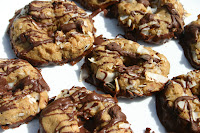
Busy days and Chocolate Chip Oatmeal Cookies

I’m fortunate that with the summer months, my schedule is changing again to a more relaxed pace, but even that is only for the time being; who knows what next week will bring? And what if I'm suddenly in a crazy flurry of goings-on, and I don't have time to look around the cookbooks for a good recipe to bring to tonight's potluck? Well, that's a luxury problem, for sure. But even knowing that, that’s why I like to have a list of dessert recipes that I can count on, that have been tried and revised. These are the sweet treats I can make for my own home for a few days, or for friends and group events where food is always brought along. For me, this list contains a fair share of cookies, all of which have previously been presented against discriminating taste-testers, and have received praise and the smiles of individuals who have sampled a truly delicious dessert.

One of the recipes that I have recently added to this exclusive repertoire is a chocolate chip oatmeal cookie. This cookie is admittedly a simple one, but in the past week, it’s received stellar reviews from a mixed audience, those ranging in age from 5 years old to those in their 60s. Cookie-lovers and those lacking the all-important sweet tooth found these cookies more than delightful, and I am in agreement.

I found that these cookies are best eaten the day of or the day after baking; two days later, and they were already losing their quality. But, even still, on the second day, there was the same crispness and the same subtle sweetness as the day before, and there was not anything wrong with the ones that had lasted more than one day. I used milk chocolate chips for this recipe, which I think gave the cookies a bit more of a sugary taste, but not in an overbearing way at all. And the measurement of oats – 3 cups – was ideal: not such a small bit that they got lost in the dough, nor an excessive amount. I’m happy to keep this recipe on hand for the emergency cookie days, when I know I need to whip up a batch of something delicious, but there simply is not enough time for experimentation.


Chocolate Chip Oatmeal Cookies

Yield: About 3 dozen

Ingredients:
1 cup butter, softened
1 cup brown sugar
½ cup evaporated cane juice
2 eggs
2 tsp. vanilla extract
¾ cup unbleached white flour
¾ cup whole-wheat flour
½ tsp. baking soda
1 tsp. salt
3 cups quick oats
1 cup chocolate chips

Directions:
1. Preheat oven to 325º F.
2. In a large bowl, mix together the butter, brown sugar, and cane juice. Add the eggs and combine, then mix in the vanilla extract.
3. In another bowl, whisk together the flours, baking soda, salt. Gently stir in the oats. Add the dry ingredients to the butter and sugar mixture, and mix well. Stir in the chocolate chips. If desired, refrigerate dough for ½ hour – 2 hours.
4. Scoop dough by the tablespoonful onto baking sheets. Bake for 12-14 minutes. Cool on wire racks.

Thursday, May 20, 2010

Homemade Samoas™

My favorite Girl Scout cookie is the Samoa™; I love the blending of coconut and chocolate, I love the rich dark chocolate, I love their shape. However, there are a couple of things I do not love about Samoas™, so when I saw this recipe for homemade Samoas™, I couldn’t wait to try them out.

The preparation was a meditative delight, and it brought me working with dough and melted chocolate. Be ready to get your hands dirty making these. And when they had cooled, and I took my first bite of these homemade treats, I knew I had found a recipe that will forever stay in my lexicon. Although these are vegan cookies, don’t think that you must be a vegan to enjoy these; they are amazing, and the reception I received from my group of taste-testers was overwhelming. They implored me to make another batch as soon as possible. And if you are vegan, then these are a perfect egg and dairy-free cookie to bake and share with vegans and non-vegans alike. The addition of coconut oil, as opposed to any other type of fat, fits in so well with the coconut flavor, and helps to make the cookies even more wholesome.

As a side note: the coconut I used was rather broad, and I did not chop it up into smaller bits. For a more authentic homemade Samoa™, go for the finely shredded variety of coconut (unsweetened!).


Homemade Samoas™
From Vegan Cookies Invade Your Cookie Jar

Yield: About 1 dozen

Ingredients:
2 cups finely grated unsweetened coconut
1/3 cup unrefined coconut oil
¾ cup packed brown sugar
1/3 cup milk
1 Tbsp. ground flaxseeds
1 ½ tsp. vanilla extract
1 cup unbleached white flour
¼ tsp. baking soda
½ tsp. salt
For topping:
1 cup semi-sweet chocolate chips
2 Tbsp. unrefined coconut oil

Directions:
1. Preheat oven to 350º F. Line a baking sheet with parchment paper.
2. In a large heavy skillet, toast the coconut over medium-low heat. Stir occasionally until coconut is a light golden brown. Remove from heat.
3. In a large bowl, blend the coconut oil, brown sugar, milk, flaxseeds, and vanilla extract. Add flour, baking soda, and salt, and mix well. Fold in the coconut.
4. Scoop 1 tablespoon of dough and roll into a small ball, then flatten and place on the baking sheet. Work a small hole into the center. Repeat until all the dough is used. Bake for 8-9 minutes. Let cookies cool.
5. Melt chocolate chips and coconut oil in a double boiler. Let the mixture cool slightly. Dip cookies bottoms in the chocolate and return to the baking sheet. With a fork or a pastry bag, drizzle the remaining chocolate over the tops of the cookies.
6. Chill the cookies in the refrigerator, or let sit, until chocolate is set.

Thursday, May 13, 2010

Strawberry Rhubarb Pie Season

The first strawberry rhubarb pie of the season is always such a welcome treat. Whether it comes from the bakery, a friend’s oven, or my own kitchen, I look forward to the delicious flavor that these two fruits work together to achieve. The good news is that this pie can really be made year-round, with frozen strawberries and frozen rhubarb. But still, nothing beats fresh fruit in a pie. I like how the filling in this strawberry rhubarb pie is quite straightforward, and everything needed was already on hand in the pantry. Tapioca or arrowroot starches are a substitute for corn starch, so that can be used instead if that is what’s available.

And this pie crust was a definite success: flaky and buttery, but without being too heavy. I’m still working on my pie-making skills, so my lattice tops are not anywhere near perfection; that’s why I like to do a dough crumble to top the pie. But practice would certainly lead to much prettier pies, so maybe with the bounty of summer fruit on its way, I can work a bit harder on my pastry skills. No matter how it looks, though, this sweet and tart pie is absolutely satisfying; I’m already looking forward to making another one.

Strawberry Rhubarb Pie

Adapted from Nourishing Traditions

Yield: 1 9-inch pie

Ingredients:
Flaky Pie Crust-
1 1/3 cups unbleached white flour
Pinch sea salt
Pinch sugar
½ cup unsalted butter, chilled and diced
2 egg yolks, slightly beaten
3 Tbsp. cold water
Filling-
2 cups rhubarb, cut into ½ inch pieces
2 cups strawberries, sliced
½ cup whole cane sugar
2 tsp. cinnamon
2 Tbsp. tapioca starch or arrowroot
2 Tbsp. butter

Directions:
Crust-
1. In a medium bowl, sift together the flour, salt, and sugar. Cut the butter into the flour mixture until crumbly. Add the egg yolks, then the cold water, and immediately blend together well, preferably with your hands.
2. Turn the dough onto a large sheet of wax paper and form into a ball. Wrap it up, and refrigerate for at least 4 hours.
Pie-
1. Preheat oven to 450º F. Place the rhubarb and strawberries into a large bowl. Add the sugar, cinnamon, tapioca starch and toss together. Let stand for 15 minutes.
2. Remove dough from refrigerator. Butter or grease a 9-inch pie plate. Roll out the dough and press into the pie plate, reserving some for the topping of the pie.
3. Fill the pie crust with the filling, and dot with small pieces of butter. Top with lattice work or dough crumbles.
4. Bake at 450º for 10 minutes. Reduce heat to 350º and bake another 35-45 minutes, watching it carefully for the last 10 minutes. The crust should be brown, the filling should be bubbling slightly. Let cool, and serve warm or cold.

Wednesday, May 5, 2010

Buckwheat Scones

It’s always fun to try out a new type of flour, and see how its unique characteristics translate into a baked dish. This was my first time using buckwheat flour, and although a part of me wanted to make buckwheat cookies, I decided to try something that I would be able to eat for breakfast the next morning. That’s not to say that cookies cannot be a breakfast item, but I had a very specific intention in mind with these. Before I get out in the morning to do a day of gardening, I like to have a filling and wholesome breakfast; if I eat too much sugar in the morning, then I end up feeling overfull and slightly off-balance. But these scones, while sweetened with a bit of brown sugar, do not overwhelm. They provided me with a hearty satiation, as opposed to a heavy bloat.

The buckwheat gave the scones an earthy quality, and the slight addition of flaxseeds added to the nuttiness of the flour. And after I did a little research on buckwheat, I found out what a nutritional and fiber-full grain it truly is. Not only is it high in dietary fiber, but also in manganese and magnesium, and it’s been said to help lower cholesterol levels and blood pressure. I think the next step would be to get some buckwheat groats and prepare it as a breakfast cereal. For a quicker morning meal, these scones were filling and delicious, and I could feel the positive energy from the buckwheat helping me through my morning work.

Buckwheat Scones

Ingredients:
1 cup unbleached white flour
½ cup whole wheat flour
2/3 cup buckwheat flour
½ tsp. sea salt
1 Tbsp. baking powder
1 Tbsp. ground flaxseeds
6 Tbsp. unsalted butter, chilled and diced
1 egg
¼ cup brown sugar, packed
½ cup rice milk
½ cup dates, chopped
Cinnamon and sugar for sprinkling

Directions:
1. Preheat oven to 400º F. Line a baking sheet with parchment paper.
2. In a large bowl, whisk together the flours, salt, baking powder, and flaxseeds. Cut in the butter and blend until there are course crumbs.
3. In a small bowl, mix the egg, brown sugar, and rice milk. Pour this mixture into the flour mixture, and blend well. Stir in the dates.
4. Turn the dough onto the prepared sheet, and shape into a circle, about ½ inch thick. Cut the dough into 4, 6, or 8 wedges, and sprinkle with cinnamon and sugar. Bake for 20 minutes, and cool on a wire rack.

Thursday, April 29, 2010

Gluten-Free Coconut Macaroons

Coconut macaroon recipes are not terribly difficult to find, and when I saw this one for Gluten-Free coconut macaroons, I hesitated for a moment and wondered if not most coconut macaroon recipes were actually gluten-free. As I looked into several other recipes, it looks like a good handful are. But these particular macaroons do call for flour in the recipe, and so brown rice flour is used to make the cookies free of gluten. The result of adding flour and eggs to a macaroon recipe is a much cakier concoction, and these did turn out quite rich. I made one batch of smaller macaroons, and one of larger macaroons, and given the texture and strong coconut taste, I preferred the smaller cookies. Of course, the coconut and the chocolate make a terrific flavorful combination, and I like the browned edges. I did keep a close eye on them toward the last few minutes, though, so that I did not cross the fine line into burned macaroons.

Gluten-Free Coconut Macaroons

Yield: 2 dozen

Ingredients:
2 eggs
2/3 cup agave nectar
1/8 tsp. sea salt
2/3 cups brown rice flour
1 tsp. vanilla extract
3 cups sweetened shredded coconut
½ cup semi-sweet chocolate chips (gluten-free)

Directions:
1. Preheat oven to 350° F. Cover two baking sheets with parchment paper.
2. In a large bowl, whisk together the eggs, agave nectar, sea salt, flour, and vanilla extract until well-blended. Stir in the coconut and then the chocolate chips.
3. Drop the dough by the tablespoon-full on the prepared baking sheets. Bake 12-15 minutes, until they are golden brown around the edges. Cool on the baking sheets.

Thursday, April 22, 2010

Rhubarb Mini-Muffins

Spring has always had a special place in my heart, and after chilly, dreary winters, there's something magical about sunny days and warm breezes. But now that I'm living on a farm, I'm experiencing a whole new dimension to the season. I walk through the gardens and see evidence of life that has been dormant all winter, finally flourishing in the milder temperatures. In the greenhouse and cold frames are burgeoning little plants, many of which I started from nothing more but a tiny speck of a seed. I have pots of chard, kale, and broccoli on my deck, and already there are strong leaves and bright colors, indications of health. What a truly awesome sight!

For the past two years, I have been eating more seasonally, in a way, but not very intentionally. I've been buying the produce that looks good, and I know that fresh raspberries in January are not the best choice to make. But I haven't been paying much attention to which vegetables are growing each month, and when the best time for them are. However, I recently saw two beds in the garden that were lush with leafy looking greens, though I had no idea what lived there. When I looked closer, I saw that these glorious plants were rhubarb. I had never really known when rhubarb was in season, and I've only been cooking with it for the past year or so. But here, steps from my home, was rhubarb, ready to pick and eat (although, do not eat the leaves of a rhubarb plant - they are toxic to humans).

I saw very clearly how the rhubarb is in season, and so I picked some stalks and thought about what I would do with them. I found an interesting idea for rhubarb muffins, and so I put together a batch of these seasonal mini-muffins for my Kindergarten class. Although they were not quite as excited as I was about the idea of rhubarb muffins, everyone still enjoyed them. The rhubarb is not too strong, and there is enough sweetness in the muffins to give them a balanced taste, perfect for snack time or breakfast time.


Rhubarb Muffins

Yield 1 dozen muffins or 2 dozen mini-muffins

Ingredients:
1 ½ cups all-purpose flour
1 cup whole-wheat flour
¾ cup packed brown sugar
1 tsp. salt
1 tsp. baking soda
1 tsp. ground cinnamon
1 egg, lightly beaten
1 cup buttermilk
2/3 cup vegetable oil
1 tsp. vanilla extract
2 cups finely chopped rhubarb
Topping:
2 Tbsp. whole cane sugar
2 tsp. ground cinnamon

Directions:
1. Preheat oven to 375 ° F
2. In a large bowl, combine flours, brown sugar, salt, baking soda, and cinnamon. In a separate bowl, combine egg, buttermilk, oil and vanilla.
3. Stir the buttermilk mixture into the dry ingredients until moistened. Fold in rhubarb. Fill paper-lined muffins cups about half full. Combine topping ingredients and sprinkle over each muffin. Bake for 15-18 minutes.

Thursday, April 15, 2010

Maple Coconut Bar Cookies

Somewhere, in a bakery that I cannot remember, I tried a sandy and maple-y bar cookie. While I do not recall where I ate the bar cookie, I do remember the rich maple flavor and the buttery cookie base. I recently came across a recipe for maple cookies, and remembering this one maple bar I once had, I decided to play around with this recipe and see what I could come up with.

I really enjoyed the addition of coconut to these cookies, an ingredient I decided to stir in on a whim. The cookie itself is not too sweet, but it does have a delicious buttery taste that goes well with the subtleness of brown rice flour. They have a much more cakey texture, as opposed to a shortbread sandy-ness. And as far as the maple: It was definitely present, and it gave a light, lovely taste, but if I wanted to make these bars really maple-y, I could have added a teaspoon of maple extract, in place of one teaspoon of vanilla extract. Even still, these were no disappointment. They were a simple bar cookie to bake up, and respond well to some experimentation.


Maple Coconut Bars

Ingredients:
½ cup butter, melted and cooled
¼ cup evaporated cane juice
½ cup maple syrup
2 tsp. vanilla extract
1 large egg
1 cup brown rice flour
¼ tsp. sea salt
1 cup shredded coconut

Directions:
1. Preheat oven to 350° F. Lightly grease an 8-inch square baking dish.
2. In a large bowl, combine butter, sugar, maple syrup, vanilla and the egg and whisk until smooth. 3. Add in flour and salt, then add in coconut and stir. Spread into prepared baking dish.
3. Bake for 20-25 minutes, until set and lightly browned.
4. Cool in pan on a wire rack.

Thursday, April 8, 2010

Peanut Butter Chocolate Bars

Once again, peanut butter and chocolate join forces to create an amazingly delicious dessert. This is a wonderful no-bake recipe I found in one of my favorite cookbooks: How to Be a Domestic Goddess. Although this is a recipe found under the section “for kids,” I wasn’t able to find an adult who found these bars to be too childish. In fact, it was a good thing there was a lot of dancing at the party I brought these to, because they is a bit sugary, and dancing off the slight sugar high was very fulfilling. I put it together the day before I was to serve it, and it stayed fresh in the refrigerator, waiting to be served. I also cut these as small as possible, because in addition to being quite sweet, these are pretty rich – unsurprising, given the ingredients. Still, they were a hit with everyone who tried them, and I especially loved how the creamy peanut butter base went with the hardened chocolate topping: just like a peanut butter cup!


Peanut Butter Chocolate Bars
Courtesy of How to Be a Domestic Goddess

Ingredients:
For the base –
¼ cup dark brown sugar
1 cup confectioner’s sugar
¼ cup unsalted butter, softened
¾ cup plus 2 Tbsp. creamy peanut butter
For the topping –
7 oz. milk chocolate
4 oz. bittersweet chocolate
1 Tbsp. unsalted butter

Directions:
1. For the base – blend all of the ingredients together in a bowl with an electric mixer. Combine until smooth. Press the mixture into a greased 9 in. square baking pan.
2. For the topping – melt the chocolates and butter together in a double boiler. Immediately spread onto the base.
3. Place in the refrigerator to set. When cool, cut into small squares.

Friday, April 2, 2010

Spring Chicks and Egg Nests

It’s been an interesting spring so far: lots of rain with mostly chilly days, yet loads of daffodils and tulips blooming all over. There are moments when the sun peeks out from behind the clouds, and the warm rays remind me that it is really April, after all. There have been nights, clear and bright, when the air is fresh and fragrant with new growth, and I can smell the hints of spring all over. Today, the wind is gusting at monster speeds, but spring soldiers on: I’m on duty this weekend, monitoring and taking care of the baby chicks that are hatching out of their eggs, after meticulous care to keep them warm and safe. As of this morning, I can hear cheeping coming from a couple of the eggs, and these two have small pecked-out holes, where the chicks are planning to emerge. A few of the other eggs are rocking back and forth, the chicks presumably desperate to start on their way out.

I’ve never experienced this before, watching new life appear from inside an egg. It reminds me of some crucial themes of springtime: birth, life, growth. It also reminds me that Easter is already this weekend, and that there are many delicious egg-themed candies out there for children who have not yet seen real eggs hatching. Still, I tend to think of Easter candy as a great celebration of the major symbols of spring. Of course, I probably should go and eat some leek or rhubarb to celebrate spring, as opposed to another little bag of Cadbury eggs. But those eggs can come in handy when making spring desserts especially for little ones (or the young at heart, the perpetually sweet-toothed).

I saw these chocolate egg nests in a magazine a long time ago, and I thought that this year, what with eggs hatching and spring apparent all around me, these would be a good treat to try out. They’re simple to make, and though not complex in flavor, they still are absolutely yummy. My 4-year old neighbor will be receiving one of these that I made today, and although I hope she enjoys it, I’m not sure it will compare to the sight of newborn chicks, just out of their shells.


Chocolate Egg Nests

Yield: About 8 nests

Ingredients:
2 Tbsp. butter
1 oz. dark chocolate
7 oz. milk chocolate
¾ cup shredded wheat, shredded
About 24 candy-coated eggs

Directions:
1. In a double boiler, melt the butter and the chocolates. When just melted, remove from heat and let cool only a moment.
2. Add the shredded wheat to the melted chocolate and combine. With your hands, form small mounds, about 2 or 2 ½ inches across. Place these mounds on parchment paper. After a few moments, firmly place 2 or 3 candy-coated eggs in the center of each mound.
3. Cool completely (preferably not in the refrigerator).

Friday, March 26, 2010

Ginger Cookies with Brown Rice and Whole Wheat Flours

Ginger cookies are my mother’s favorite, but I’ve never really gotten on the bandwagon. Although I enjoy gingerbread around the holidays, ginger cookies don’t quite do it for me throughout the rest of the year. Regardless, I know plenty of people who respectfully disagree with my tastes, and so when I found a recipe for ginger cookies, I decided to play with it a bit, and make the cookies for my friends.

Of course I tried one, and even for someone who doesn’t love this type of cookie, these were very good: spicy and soft. I also liked the combination of brown rice flour and whole wheat flour, along with the strong (but not overpowering) molasses flavor. Sprinkled with a little bit of sugar before baking, I thought they gave off an attractive shine, and everyone who sampled them enjoyed the taste even more. For all of you ginger cookie-lovers, I would say that this recipe is a keeper.


Ginger Cookies

Yield: 2 dozen

Ingredients:
1/3 cup butter, softened
2/3 cup molasses
1 egg, beaten
1 cup brown rice flour
1 ½ cups whole wheat flour
1 tsp. baking soda
2 tsp. cinnamon
1 tsp. ground ginger

Directions:
1. Blend butter and molasses in a medium bowl until fluffy. Add egg and mix in thoroughly.
2. In a separate bowl, combine flours, baking soda, cinnamon, and ground ginger. Blend into butter mixture until just combined. Chill dough in the refrigerator for at least 2 hours.
3. Preheat oven to 375° F. Roll out dough into small, 2-inch circles and place on greased cookie pans.
4. Bake for 7-9 minutes, or until cookies are brown on the bottomed. Cool on wire racks.

Saturday, March 20, 2010

March Madness I'll Follow: Cake Vs. Pie

Cake Vs. Pie at Jezebel.com!

Now here's a March Madness competition that I'm willing to follow, from the sure-thing winner of apple pie, all the way through to coconut cake and French Silk pie. It's tough to predict right now, even for myself. Off the top of my head, I would say that cake wins, no questions, every time. But, oh, the pies that are in the running! Lemon Meringue! Rhubarb! Sweet Potato!

Who will come out victorious? Pie or cake? Both? Does it matter? Personally, I could go for a slice of German Chocolate, with a side of Boston Cream, right now.

Friday, March 19, 2010

Chocolate Cupcakes with Buttercream Frosting

The world of cupcakes is a vast, ever-expanding one. Whatever kind of cake or dessert or flavor or dietary preference you indulge in, a cupcake has been created to imagine it. Some cupcakes are all about the recipe, and find a perfect balance between cake flavor and icing. Others maintain their substance in the decoration, not dissimilar to fancy cakes, and the craftier the better.

I’ve tried many cupcakes in my day, from the homemade to the museum-quality masterpiece, and the best cupcake that I’ve ever eaten remains to be the chocolate cupcake at Sugar Sweet Sunshine in New York City. There, the recipe has been perfected, and in a little innocuous shop with a cutesy sign out front, buttercream heaven awaits those who are in need of a sugar rush.
The last time I was in NYC, I relished the moment when I walked through the front door of the little cupcakerie, once again after a long year apart from it. Although every bakery has a wonderful aroma of flour, butter, sugar, and spices, this place has the most specific smell I could imagine (only because of its evocative quality in my brain, of course), and breathing in the buttercream scent was like returning to a happy dream. I grinned as I ordered my cupcake: the “black & white…just right.” The lady behind the counter chose a perky pink frosted cupcake, handed it to me, and it was as though I was reunited with a long lost friend. I sat by the window, carefully placed the cupcake on the bistro table, and I sat down, never taking my eyes off of the beautiful sprinkled frosting. And the first bite of that cupcake…the first bite of that cupcake sent a complex swelling of sugar, nostalgia, and pure joy through my body. I must have looked slightly off my rocker as I sat there, consuming this cupcake in slow, pleasurable bites, a smile constantly on my face. It was better than I even remembered it.

Thinking about that cupcake now, it saddens me deeply that it is 3,500 miles away. That I cannot simply take the subway to Sugar Sweet Sunshine, that I cannot even order one weensie cupcake through the mail. It also saddens me that I cannot replicate it precisely. I know this is the case, because I know that Sugar Sweet Sunshine cupcakes are not wholesome cupcakes, and now that I do all my own baking, it’s almost impossible for me to go to the store and buy shortening or pour cups upon cups of sugar into a mixing bowl. I’m bound by my love for wholesome desserts. With that in mind, I made chocolate cupcakes with buttercream frosting, knowing full well that they would not be the SSS cupcakes I long for.

Regardless, these were darn good cupcakes. They were springy and moist with a very rich chocolatey flavor. And the buttercream was an experiment that turned out pretty well. I had been searching for a good-quality buttercream recipe, and this one I found from Organic Valley. It calls for non-fat powdered milk, and although I found the butter flavor to be slightly overwhelming, the frosting turned out great, with a nice stiff and spreadable texture.

I don’t know when I’ll be in New York City again, or if a kind friend will send me one or two Sugar Sweet Sunshine cupcakes, but until I get to savor one of theirs again, this is a wonderful, slightly healthier, substitute.


Chocolate Cupcakes

Yield: 1 dozen

Ingredients:

¾ cup unsweetened cocoa powder
¾ cup all-purpose flour
½ teaspoon baking powder
¼ teaspoon salt
¾ cup (1 1/2 sticks) unsalted butter, room temperature
¾ cup sugar
3 large eggs
1 teaspoon vanilla extract
½ cup sour cream

Directions:
1. Preheat oven to 350° F. Line 12-cup standard muffin tin with paper liners.
2. Into a medium bowl, sift together cocoa, flour, baking powder, and salt; set aside. In a mixing bowl, cream butter and sugar until light and fluffy. Add eggs, one at a time, beating well after each, then beat in vanilla. Add the flour, alternating with sour cream, and beginning and ending with flour. Mix well.
3. Pour batter into muffin tin. Bake 20-25 minutes. Cool in pan 5 minutes; transfer to a wire rack to cool completely. Decorate as desired.

Buttercream Frosting

Courtesy of Organic Valley

Ingredients:

1 cup dry milk
1 stick unsalted butter, softened
¼ cup honey
1 tsp. vanilla extract
1 Tbsp. water

Directions:
Mix all ingredients together with an electric mixer until smooth (at least 5 minutes).

Sunday, March 14, 2010

Irish Brown Soda Bread for St. Patrick's Day

St. Patrick’s Day is right around the corner; for an Irish lass like myself, this is a day of celebration of heritage, family, lore, and traditions. When I made a trip to Ireland a couple of years ago, I immersed myself in the literature, the music, and the food. I studied hard and learned a lot, and while I patiently wait for the time I can return and explore the Emerald Isle a bit more, I continue my own personal education and commemoration of Irish history and culture.

When I was younger, I hated corned beef and cabbage, and it’s been awhile since I’ve had that signature meal. But now, being exposed to the full gamut of what Irish cuisine has to offer, I’ve opened up to much more that this one quintessential dish. Irish soda bread is an easy Irish favorite, and this brown bread recipe is a hearty yet healthy twist on the bread. Fresh out of the oven, or rested after awhile, this bread is simple to make and entirely versatile. The short list of ingredients are easy to come by, or are probably already in the kitchen, and as far as preparation, it would be a breeze to put this together in the evening, ready for the next morning. It can be a companion to a typical Irish breakfast, a side dish for a farmer's lunch, or a snack between meals.

I ate my first warm and satisfying slice with some Kerrygold butter, a delectably creamy Irish butter. If you want some other authentic pairings for the bread, consider smoked salmon or a slab of cheddar cheese – given their proximity to water and their endless pastures of green grass and grazing cows, the Irish do both of these foods exceedingly well. The best meal I had in Ireland consisted of little more than soda bread, cheeses, and a salad, but it was better tasting than some of the most gourmet meals I’ve eaten here.

Ireland will have to wait again for me, but at least I can eat as though I were still there. I’ll be having a couple of slices of the bread, along with some Irish cheese, for St. Patrick’s Day this year (while wearing green and reading Dubliners, of course.) This bread will also be a pleasant year-round reminder of what I hope to return to sometime soon.


Irish Brown Bread

Ingredients:
2 ½ cups whole wheat flour
½ cup unbleached white flour
½ cup instant rolled oats
2 Tbsp. brown sugar
1 Tbsp. flaxseed meal
1 tsp. baking soda
1 tsp. baking powder
½ tsp. salt
2 cups buttermilk
1 egg, beaten

Directions:

1. Preheat oven to 325° F.

2. Coat a loaf pan with cooking spray.

3. In a large bowl, whisk together the flours, oats, brown sugar, flaxseed meal, baking soda, baking powder, and salt.

4. In a small bowl, combine the buttermilk and egg. Add the buttermilk mixture to the dry ingredients and blend, careful to not over-mix.

5. Spoon the mixture into the prepared pan and bake for 60-65 minutes. Cool on a wire rack.

Tuesday, March 9, 2010

Heavenly Chocolate Bars

I do try to maintain a consistent flow of healthy desserts for myself and my friends, but sometimes there’s a recipe that I find that is just too yummy sounding not to try. I found this recipe for a version of 7-layer bars, and I played around with it a bit to get these rich, fudgey, absolutely addictive chocolate bars. The reason I could not seem to get enough of these is simply that they are entirely constructed out of sugar. The little kid in me relished the sugar high, and once the first wave came, wanted more and more. Truthfully, there really is not much wholesome in these dessert bars, unless you add a healthy topping like dried fruit or nuts, and even then, it’s little more than decoration. So these aren’t a breakfast bar or a treat that the kids should have right after school, but there’s no getting around the fact these are simple to make and an absolute crowd pleaser (I actually did sample it out to other people besides myself).
For my toppings, I chose a variety that went together both flavorfully and aesthetically, like the dried cranberries and the coconut. I’d be interested to see what other toppings were added, and I’m sure they could be a very stunning dessert. These would be best cut into small bite-sized squares, and definitely after cooling for several hours. The entire mixture needs to sufficiently set, otherwise it is too gooey, and the flavors haven’t had a chance to blend. Even though they’re bites of sugary goodness, there is a wonderful creamy chocolate taste, thanks to the presence of the condensed milk.

I wouldn’t want to have these chocolate bars around all the time (as if they would even last long, anyway) but they’re a great portable dessert to travel to picnics or bake sales with, or to set out with other finger foods for a group to graze on.


Heavenly Chocolate Bars

Ingredients:
1 3/4 cups all-purpose flour
1 cup sugar
1/4 cup baking cocoa
1/2 cup cold butter or margarine
1 (14 ounce) can sweetened condensed milk
2 cups semisweet chocolate chips, divided
Toppings, such as walnuts, dried cranberries, and coconut

Directions:
1. Preheat the oven to 350° F.
2. In a large bowl, combine flour, sugar and cocoa
3. Cut in butter until crumbly. Set aside 1 cup for topping. Press remaining crumb mixture into a greased 13-in. x 9-in. x 2-in. baking pan. Bake for 6-8 minutes or until set.
4. In a saucepan, combine condensed milk and 1 cup of chocolate chips; cook and stir over low heat until melted. Carefully spread over crust. Sprinkle the reserved crumb mixture over the chocolate, followed by the remaining chocolate chips, and any additional toppings.
5. Bake for 15-20 minutes or until top is set. Cool before cutting.

Monday, March 1, 2010

Forbidden Black Rice Pudding

I was emailed this recipe from The New York Times, and reading over the ingredients, I wondered how something with so many wonderful, healthful components could ever turn out wrong. The mixing of ingredients like honey, blueberries, and coconut milk were sure to create a delicately sweet flavor that would be a perfect accompaniment to the blooming daffodils we have here right now on San Juan Island.

When I had some friend over for dinner last week, I made this rice pudding early in the morning, so that it would set, and also so that I had time to whip up a batch of brownies in case the recipe didn’t turn out like I’d hoped. And I was definitely skeptical; this isn’t the prettiest dish, and it came out more watery than I expected. When I make it again, I might experiment with the liquid amounts. But despite its consistency, the pudding turned a Springy purple-blue, and it was well-received by everyone who sampled it. My expectations of it were met. And I have quite a bit of the Forbidden rice (or Chinese black rice) leftover, so I can try this recipe again and again. Despite its name, the rice was fairly easy for me to find – I picked it up at the grocery store along with rice and coconut milks.


Forbidden Rice Pudding

Ingredients:
½ cup Forbidden rice (Chinese black rice)
1 cup water
¼ tsp. salt
1 cup rice milk
1 cup unsweetened low-fat coconut milk
¼ cup mild honey
1 tsp. vanilla extract
1 cup blueberries

Directions:
1. Combine the rice, water and salt in a saucepan, and bring to a boil. Reduce the heat, cover and simmer 35 to 40 minutes, until all of the water is absorbed.
2. Add the milk, coconut milk and honey to the rice, and stir together. Bring to a boil, stirring, then reduce the heat and simmer, stirring often, for five to 10 minutes, until creamy. Add the vanilla and blueberries, and continue to simmer for another five minutes.
3. Scrape into a bowl or into individual serving dishes. Cover and chill for at least two hours before serving.

Tuesday, February 23, 2010

All-Inclusive Monster Cookies

A favorite cookie of mine has recently become the “monster cookie,” and it’s pretty clear as to why: these cookies contain a bit of everything, and combine the best of peanut butter cookies, chocolate chip cookies, and oatmeal raisin cookies. I’ve also seen them called “kitchen sink” cookies, as in “everything but the…” When I made these cookies, I was received with two perspectives: one friend told me that she loved them, but they were quite heavy and eating one was more than enough for a sitting. Another friend reported back that he ate four of them after a hike, and that they were the perfect type of energy food. I agree with both; these cookies have a lot going on, ingredient-wise, and with peanut butter and oats, they make a very substantial snack. On reflection, the amount of sugar could be reduced, I’m sure, and the chocolate chips could possibly be omitted, if you wanted to make a hearty breakfast cookie. Of course, I would not leave the chocolate out, and even with their presence, I think that these cookies do pretty well as far as healthfulness goes. The consistency was the one thing that took me off guard (although I should have seen it coming, due to the lack of flour in the recipe): these are moist cookies and I needed to package them carefully so that they would travel well. Aside from that, these monster cookies turned out to be everything I could want in a cookie.

Monster Cookies

Ingredients:
3 eggs
1 ½ cups brown sugar
½ tsp. salt
2 tsp. baking soda
½ tsp. vanilla extract
1 ½ cups crunchy peanut butter
¼ cup applesauce
1 cup chocolate chips
¼ cup raisins
4 cups rolled oats

Directions:

1. Preheat oven to 350° F
2. In a very large mixing bowl, cream the eggs and sugar together with an electric mixer.
3. Add salt, baking soda, vanilla, peanut butter, and applesauce; blend together well.
4. Add chocolate chips, raisins, and oats. Stir until everything is combined.
5. Drop cookie dough by the tablespoonful on cookie sheets, 2 inches apart.
6. Bake for 10 to 12 minutes. Let stand about 3 minutes before transferring to wire racks to cool.

Tuesday, February 16, 2010

Salty Oat Cookies

A friend of mine is addicted to the salty oat cookies found at Teaism, a DC-area tea house. That's a problem for him now that he lives in the Pacific Northwest, so I wanted to find a way to bring him his favorite cookies without having to ship them in bulk across the country (which I doubt is even possible). I did a bit of research on how to best achieve the essence of the salty oat cookie, and put together this recipe. I have eaten the Teaism variety before, so I basically knew what I was working with. What makes these cookies distinctive is the addition of course salt onto the cookies once they are on the sheet and nearly ready to go in the oven; that way, you get a hit of saltiness when you first bite in, but the cookie base is not over-salted. It is a pretty standard oatmeal cookie starter. One thing I love about this recipe is the buttery taste that goes well with the heartiness of the oats, and the addition of brown rice flour (instead of entirely all-purpose flour). Even without the course salt finishing off the dough, these cookies would be delicious. My friend tried them and was thrilled to have found a stand-in for the tea-house cookies; of course, now I have to worry about consistently supplying him with his favorite cookies. Next time, I might try mixing some chocolate chips, and hope that they don’t compromise the integrity of a fantastic cookie.

Salty Oat Cookies

Ingredients:

  • ¾ cup unsalted butter, cold
  • ¾ cup packed light brown sugar
  • ½ cup granulated sugar
  • 1 tsp. baking powder
  • ¼ tsp. baking soda
  • ½ tsp. cinnamon
  • 2 eggs
  • 1 tsp. vanilla
  • 1 ¼ all-purpose flour
  • ½ cup rice flour
  • 2 cups rolled oats
  • ½ cup raisins
  • Course salt

Directions:

1. Preheat the oven to 375° F.
2. In a large bowl, blend the butter and sugars with a hand mixer. Add the baking powder, baking soda, and cinnamon and combine until the mixture is crumbly. Add the eggs, one at a time, and then the vanilla, blending well.
3. In a small bowl, whisk together the flours. Then, add the flour mixture to the sugar mixture and blend together. Fold in the oats and raisins.
4. Drop the dough by teaspoonful onto baking trays and then sprinkle the tops with coarse salt. Bake 12-15 minutes.

Wednesday, February 10, 2010

Goat Cheese Chocolate Truffles

Looking for a unique chocolate recipe (possibly or possibly not for Valentine’s Day), I went on a long and thorough search. Although the only caveat was that the recipe must contain chocolate, I hardly felt overwhelmed. One of my greatest pastimes nowadays easily could be browsing cookbooks and the Internet for recipes I would want to try. And with my narrow condition, I was unsurprised when I found I had a great deal of sifting to do in order to get to what I wanted. As with many things in this world, when I saw this recipe, I knew it was just meant to be. Goat Cheese Chocolate Truffles: with these two main ingredients, how could I go wrong?

I have not yet had the practice that I crave making candies and confections – what a vast world of endless creativity and deliciousness! – but truffles like these are a simple entrée into this universe. The preparation was not at all difficult, and my slight hesitation did not lie in my ability to make the truffles; I just wasn’t sure how goat cheese and chocolate would mesh. Goat cheese, I love; chocolate, I adore. I was willing to try them together, but even as I set the bowl in the refrigerator to chill, I had my doubts.

Of course, I’m happy to have tried this experiment. If nothing else, I enjoyed watching the quizzical looks I received from announcing the name of the truffles. And they did provide an interesting flavor experience. I think I rolled the truffles a bit too large; these should not be bitten into two, but consumed in one bite, allowing the bitterness of the cocoa powder to mix with the sweetness of the chocolate in the truffle and the creamy sensation that the goat cheese provides. It was not entirely dissimilar from the taste of cheesecake blended heavily with chocolate (along with the richness of cheesecake). For something very different, and not terribly labor intensive, I would highly suggest whipping up a batch for a lovely gift or an addition to a dessert buffet.


Goat Cheese Chocolate Truffles
From Epicurious.com
Yield: About 25 truffles

Ingredients:
6 oz. bittersweet chocolate (not unsweetened), chopped
6 oz. (about 3/4 cup) fresh goat cheese
2 Tbsp. confectioners' sugar
½ tsp. vanilla extract
1/8 tsp. lemon extract
¼ cup unsweetened cocoa powder, sifted, for coating the truffles

Directions:
1. In a double boiler, melt the chocolate, stirring until it is smooth; remove from heat and let the chocolate cool slightly.
2. In a bowl, whisk together the goat cheese, the confectioners' sugar, the vanilla, and the lemon extract until the mixture is light and fluffy. Whisk in the chocolate until the mixture is combined well, and chill the mixture, covered, for 1 hour, or until it is firm.
3. Form teaspoons of the mixture into balls and roll the balls in the cocoa powder. Chill the truffles on a baking sheet lined with waxed paper for 30 minutes, or until they are firm. The truffles keep in an airtight container, chilled, for 3 days.

Saturday, February 6, 2010

Cran Bran Muffins

Although the majority of my baking is done solo, I’ve always loved baking with kids. I worked at an elementary school for a year, and baking projects quickly became a normal event when I was in the classroom. We made brownies and pies, strawberry lady bugs and smoothies, fruit salads and bread art. Now I’m volunteering in another elementary school, and while I haven’t had the chance to get their hands dirty with tempered chocolate or bread mixes, I have been able to bake for them. And while it doesn’t have the exact same effect of walking a group of children through the thrilling world of measuring cups and mixing bowls, I still loved it. These Cran Bran muffins were to be for snack time, and the night before as I was making them, I was full of legitimate joy, knowing that I was creating something nutritious and yummy that they would eat, they would like, and they would appreciate.

I’ll be one of the first people to tell you that what you expect to happen is rarely what occurs, but I was beyond pleased the next day; when I told everyone that I had brought muffins with cranberries in them, I heard a couple of little squeals of happiness and several smiles. I passed out the muffins, and many of the children looked up and me and gave me a polite “thank you,” which was simultaneously heartwarming and reassuring. And I’m aware that it’s silly to care about, but everyone finished their entire muffin and I heard no one complain, “I don’t liiiike this!”


I know that baking muffins for a group of kids is not particularly noteworthy or amazing, and droves of parents do the same thing every single day. But I’m not a parent yet, and I am planning on spending the rest of my life teaching in elementary classrooms surrounded by the adorableness that I get to see now only intermittently. Given how so many children eat – or do not eat at all – in this world, making a batch of muffins for these kids did feel noteworthy to me. And while I would also love to give them cupcakes or chocolate chip cookies, I felt no quarrel in putting these muffins up for snack time consumption: the ingredients are wholesome, using whole-wheat flour, wheat bran, and rolled oats, and low in sugar. The blackstrap molasses is a particularly good sweetener here, both for taste and for its low glycemic index.

Cran Bran Muffins
Ingredients:
1 cup whole-wheat flour
1 tsp. baking soda
½ tsp. salt
¾ cup wheat bran
¾ cup rolled oats
3 Tbsp. canola oil
2 Tbsp. brown sugar
2 Tbsp. blackstrap molasses
1 egg
1½ cups buttermilk
½ cup dried cranberries

Directions:
1. Preheat oven to 375°F and line a muffin tin.
2. In a medium bowl, whisk together flour, baking soda, and salt and then stir in the wheat bran and the oats. 3. In another bowl, beat together the oil, sugar, and molasses and then add the egg and buttermilk. 4. Stir the bran mixture into oil mixture, then fold in the dried cranberries.
5. Place batter in the muffin tin, filling each muffin space about three-quarters full. 6. Bake for 15 minutes, or until a toothpick inserted in a muffin comes out clean.

Monday, February 1, 2010

Kitchen Yogi Lemon Cookies

I may not care for a cookie-cutter home or a cookie-cutter marriage, but I certainly do love cookie-cutters. Recently, I received a cookie-cutter in the mail, and although I was expecting it to arrive, I was not sure what I was waiting for. All I was told was that it was a “yoga” cookie-cutter; an array of visuals flooded my mind, but I still was not sure what a yoga cookie-cutter would be. When it did come, I saw that it was an adorable miniature yogi sitting in lotus pose: its actual name is The Kitchen Yogi. I my first thought upon opening the package was, “what kind of cookie will I make out of this?”


What kind of cookie would be worthy of symbolizing enlightenment? These lemon cookies are a good contender, I think. The original recipe was very non-nourishing, so I made some adjustments in order to make them better suited to a yogi. And I had one of my yogi friends try the cookies out; he enjoyed the fresh lemon flavor, the lightness of the cookie, and of course, their shape.

I refrigerated the dough for an hour, which hardened it up nicely, but it warmed up quickly in my hands and the warmer the dough became, the more difficult to work with. I also had some trouble with the arms of the little yogi breaking off, but the extra care is worth it for these cookies. I would be interested to see how others decorate their yogis (of course, it could be a yogini instead), and hopefully will arrive at some inspiration before I made these cookies, or bring out this cookie-cutter, again. The Kitchen Yogi also comes with its own recipes for gluten free cookies and organic sugar cookies, either of which could be great to try next time.

Lemon Cut-Out Cookies
Yield: About 5 dozen cookies
Ingredients:
2 cups unbleached all-purpose flour
1 ¼ cups whole wheat flour
¼ tsp. salt
1 cup butter, softened
1 cup sugar
1 large egg
1 egg yolk
1 tsp. vanilla extract
½ tsp. lemon extract
2 tsp. grated lemon zest

Directions:
1. In a medium bowl, whisk together the flour and salt.

2. In a large bowl, beat the butter and sugar together until light and creamy, about 2 minutes. Add the egg, egg yolk, extracts, and lemon zest and mix until well-blended.

3. Slowly add the flour mixture, mixing to combine well.

4. Divide the dough into 4 round sections and wrap each section in plastic wrap, or place in a glass Tupperware container. Refrigerate at least 1 hour until firm.

5. Preheat the oven to 350°F and line two baking sheets with parchment paper. Take one section of dough and roll out on a lightly floured surface. Cut out shapes with the cookie cutters of your choice. Repeat with the other 3 dough sections.

6. Bake, one sheet at a time, for 10-12 minutes, or until the cookies are lightly browned at the edges. Cool completely on wire racks.

Monday, January 25, 2010

Bob's 10-Grain Muffins

There is a substantial amount of evidence that states that sitting down to a meal, focusing on the food, and experiencing every bite helps to promote digestion, gratitude, and a general state of well-being. Eating mindfully is important, and it is an activity that I thoroughly endorse. However, I don’t pretend that I mindfully consume every bite of every meal and every snack. Breakfast, especially, is a meal that I tend to multitask through, whether I’m getting a head start on a day of schoolwork, checking my email, or cleaning up my kitchen. Now I know this isn’t healthy on a number of levels, but sometimes, it’s downright essential. I also know that this sort of eating is essential for most people most of the time; why else the proliferation of drive-thrus and meals-in-a-bar?

One of my favorite quick, multitasking-compatible breakfast meals are muffins. They require only one hand and no utensils to eat and are highly portable. They also are highly delicious, and at times, highly unhealthy. I was pleased to find this recipe from Bob’s Red Mill for 10-Grain Muffins. The 10-Grain cereal contains hard red wheat, rye, triticale, oat bran, oats, corn, barley, soy beans, brown rice, millet, and flaxseed: a grand mixture of nutrition and hearty taste. The cereal contributes to a substantial baked good, and the butter is important because it adds to the flavor and texture of the muffins. Substitutions would be fine, but I wouldn’t recommend it for this particular recipe.

I enjoyed two for breakfast, and was satisfied for hours. My friend ate the rest of the batch (8 muffins) over the course of two days, so I’m confident in saying that these muffins are real keepers.


10-Grain Muffins

Yield: 1 dozen muffins

Ingredients:
1 large egg
½ cup evaporated cane juice
1/3 cup butter
1 cup unbleached white flour
1 tsp. salt
1 tsp. baking powder
1 tsp. baking soda
1 cup 10-Grain cereal (uncooked)
1 ¼ cup low-fat buttermilk

Directions:
1. Preheat oven to 400°F.

2. Mix 10 Grain Cereal and buttermilk and allow to stand for 10 minutes.

3. In another bowl, cream together the evaporated cane juice, butter, and egg together.

4. Add dry ingredients and buttermilk mixture. Stir only until mixed.

5. Spoon into greased muffin pan. Bake for 14-15 minutes, until tops are springy.

Wednesday, January 13, 2010

Mayan Xocoatl (Chocolate) Cookies

Chocolate was on the brain recently (which is not such an uncommon experience), as I spent a moment to appreciate the creamy and sweet chocolate bar I had enjoyed that day. And though chocolate is a modern-day mainstay, ranging from the everyday Hershey bar to the gourmet delicacy, chocolate reaches far back to the ancient Mayan culture. The Mayans were the first chocolate aficionados, and cacao was an integral part of their society and religion. They consumed chocolate in very different way than we do now; while the common chocolate bar contains milk and sugar, Mayans made a hot-chocolate-like drink called “chocolatl,” made of roasted cocoa beans, water and spice. And cacao was larger than just a consumable: the beans were also used as currency. That seems like a brilliant prospect to me. I certainly wouldn’t mind a salary comprised of chocolate (though I would prefer the sugary, milky kind); I know it would go to good use.

I have seen many variations of Mayan-inspired chocolate in the form of bars, candies, and hot cocoa mixes, and the two main components of this kind of chocolate (the Mayan word being “xocoatl”) are a hot spice, like the cayenne in the recipe below, and a darker cacao content. So I used a base chocolate cookie recipe and made a few adjustments to create something a bit closer to chocolatl: the instant espresso coffee powder add a bitterness that the unsweetened cocoa powder supports, and the cinnamon and cayenne lend a strong spiciness that would not work as well with a sweeter chocolate cookie foundation.

Moonstruck Chocolates, based out of Oregon, do a fantastic dark chocolate chili bar, with even more of a kick than these cayenne-infused xocoatl cookies.


Xocoatl Cookies

Yield: 3 dozen

Ingredients:

1 ½ cups unbleached all-purpose flour

1 ½ tsp. baking powder

½ tsp. salt

½ tsp. cinnamon

1 tsp. instant espresso coffee powder

¼ tsp. finely ground black pepper

1/8 tsp. cayenne pepper

¾ cup unsweetened cocoa powder

¾ cup unsalted butter, softened

¾ cup date sugar

1 large egg

2 tsp. vanilla

½ cup chocolate chips

Directions:

1. Sift together the flour, baking powder, salt, cinnamon, espresso powder, black and cayenne peppers and the cocoa powder. Using an electric mixture, beat the butter with 3/4 cup of the sugar until light and fluffy. Add the egg and vanilla; mix well. Add the sifted dry ingredients and blend well. Wrap dough in plastic wrap and refrigerate for 30 minutes.

2. Preheat oven to 350° F. Line a baking sheet with parchment paper. Place the remaining 1/4 cup of sugar in a small bowl. Roll a piece of dough about the size of a small walnut between the palms of your hands. Using your index finger, press an indentation in the center of the cookie. Place a few chocolate chips in the indentation. Mold the dough around the chips to enclose them completely, pressing to seal. Roll the dough into a ball and then roll in sugar and place on baking sheet.

3. Continuing forming rest of the dough. Bake 8 minutes.

Friday, January 8, 2010

Oat Brownies

Oats and oat flour are two of my favorite baking ingredients, thanks to their taste and their nutritional qualities, so I try to get creative in how I can incorporate one or the other into my baking. I'll put quick-cooking oats in my chocolate chip cookies, rolled oats in my quick breads, and varying amounts of oat flour in just about anything.

Oats are high in fiber, and thusly they are said to lower cholesterol levels while reducing the risk of heart disease. Oats come in many forms, and there are many ways to use them in the kitchen. There are oat groats, which are un-flattened oat kernels; steel-cut oats, dense and chewy; old-fashioned oats, which are steamed and rolled; quick-cooking oats which are cut more finely than old-fashioned; oat bran, the outer layer of the grain under the oat hull; and oat flour. I love them all, but I'm especially partial to the old-fashioned oats: traditional and the perfect breakfast grain.

Another favorite of mine is, of course, chocolate. So, when I came across a brownie with an oat bottom, I wanted to re-create them in my own kitchen. These brownies turned out to be a dream: I was able to convince myself that since they have oats in them, I can most definitely eat one for breakfast, and while there may have been better choices available, I don't regret the chocolate-y treat I started my day with. They turned out a bit salty, given the salt in both the base and the brownie portions, but that is not necessarily a negative. The brownies were fudgey, and matched with a chewy oat base, they were a delicious and slightly addictive dessert that I will try to eat after the lunch hour, the next time I make them.


Oat Brownies

Ingredients:

Base-

1/3 cup oat flour ¼ tsp. baking soda ¼ tsp. salt ½ cup brown sugar 1 cup old-fashioned rolled oats 1/3 cup butter, melted

Brownies-

2/3 cup all purpose flour ¼ tsp. baking soda ¼ tsp. salt 1-oz unsweetened chocolate ¼ cup butter 2/3 cup sugar 1 large egg 2 Tbsp. milk 1 tsp. vanilla extract ½ cup chocolate chips

Directions:

1. Preheat oven to 350F. In a medium mixing bowl, whisk together flour, baking soda, salt, brown sugar and oatmeal. Pour in melted butter and stir to combine. Pour into ungreased 8-inch square baking pan. Bake for 12 minutes.

2. For the brownie batter, whisk together flour, baking soda and salt in a small bowl.

3. In another small bowl, melt unsweetened chocolate and butter together. Set aside to cool.

4. Whisk together sugar and egg until light colored. When butter mixture is no longer hot, stir it into the egg mixture. Stir in the flour mixture, milk and vanilla extract, followed by the mini chocolate chips.

5. When oat base comes out of the oven, pour brownie batter on top and spread.

6. Bake for 30 minutes. Cool on a wire rack before slicing.

Sunday, January 3, 2010

No-Bake Chocolate Oat Cookies

Happy New Year!

There are times when I would love a homemade cookie, but I don't have a good window of time in my day to actually do any baking. And after the holiday baking-and-cooking extravaganza that I've enjoyed over the past few weeks, I'm not in the mood to try anything too different or heavy duty just yet. It would be easy and delicious for me to go to a bakery and enjoy one of their chocolate chip or peanut butter cookies (and believe me, I do), but I try not to make this a daily practice. This is a very simple recipe with a list of ingredients that are most likely already in the kitchen, and it takes only minutes to put it together. And while I wait for the entire batch to harden in the refrigerator, the warm mush of peanut butter, oats, and chocolate is just as good to eat out of the saucepan. The final cookie is a delightful meshing of each of the flavors, most strongly peanut butter and chocolate, so it's a little like a cookie version of a peanut butter cup, with an added crunchy texture, thanks to the oats.

No-Bake Chocolate Cookies

Yield: About 1 dozen

Ingredients:
¾ cup unsweetened applesauce
1/3 cup low-fat milk
¾ cup firmly packed brown sugar
2 Tbsp. unsweetened Dutch-processed cocoa powder
½ tsp. vanilla extract
¼ cup creamy peanut butter
1 ½ cup quick oats

Directions:
1. Line cookie sheets with wax paper.
2. Combine the applesauce, milk, brown sugar, and cocoa powder in a small saucepan. Bring to a boil, stirring constantly. Boil for 1 minute.
3. Remove the pan from the heat and stir in the vanilla and peanut butter with a wooden spoon. Stir in the oats and continue stirring until the mixture is blended.
4. Drop the dough onto the cookie sheets by heaping tablespoons. Refrigerate until the cookies are hardened.